I learned the coolest thing yesterday!
{okay so maybe i'm behind at posting, so it was really a couple weeks ago..}
{okay so maybe i'm behind at posting, so it was really a couple weeks ago..}
After I set up my silhouette to work with MTC,
I started browsing around for cool projects to do,
and ended up back on Jin's site {Under A Cherry Tree}.
I used to wonder about how some ladies in my ward were able to cut intricate designs for their cute cards,
and now I know!
It's this cool thing you can do with your silhouette called "print and cut".
And it's exactly that:
Print the image through your printer and then feed it to your silhouette to cut.
So cool!
One thing to remember though,
is that you can only do this using Silhouette Studio.
You can NOT {to my knowledge} do this using MTC.
I absolutely LOVE Jin's tutorial on this,
so that's what I'm going to show you.
Maybe someday I will get up enough guts to do my own,
but for now...
I love how her instructions are so straight forward.
Of course I followed along and now want to share a few more tips.
TIP 1:
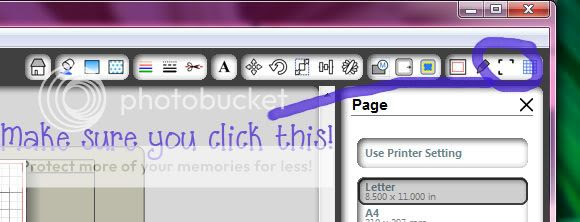
Remember to hit that little button for the registration marks.

After watching the video and doing it myself a couple times, I got excited and forgot to do this. You need those registration marks for when you feed it to your silhouette. The machine reads them before cutting the image out, for a more precise cut.
After watching the video and doing it myself a couple times, I got excited and forgot to do this. You need those registration marks for when you feed it to your silhouette. The machine reads them before cutting the image out, for a more precise cut.
TIP 2:
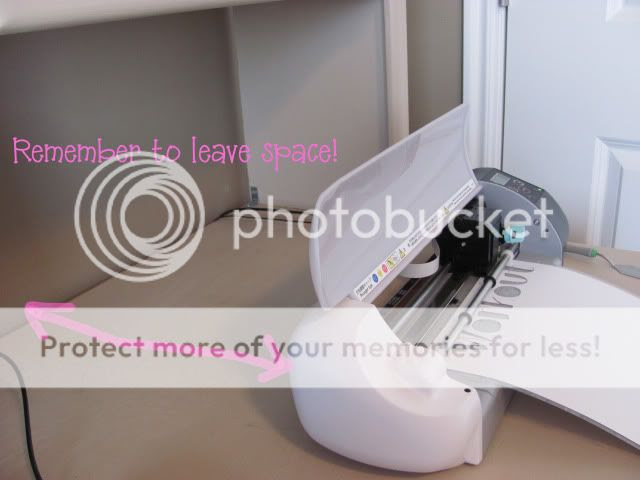
Make room for your silhouette machine to "breath". In other words, allow space behind your silhouette to feed the paper through as it works.

When I'm not using my machine I push it towards the back of my desk. Well, I forgot to pull it out further for this project, so when it was reading the registration marks, my paper bumped up against the back wall and threw off the cut. This is what you get when that happens:
When I'm not using my machine I push it towards the back of my desk. Well, I forgot to pull it out further for this project, so when it was reading the registration marks, my paper bumped up against the back wall and threw off the cut. This is what you get when that happens:
TIP 3:
Maybe I'm just a ding dong, but I'll share this anyways. When your print comes out of the printer, it will have those 3 registration marks.

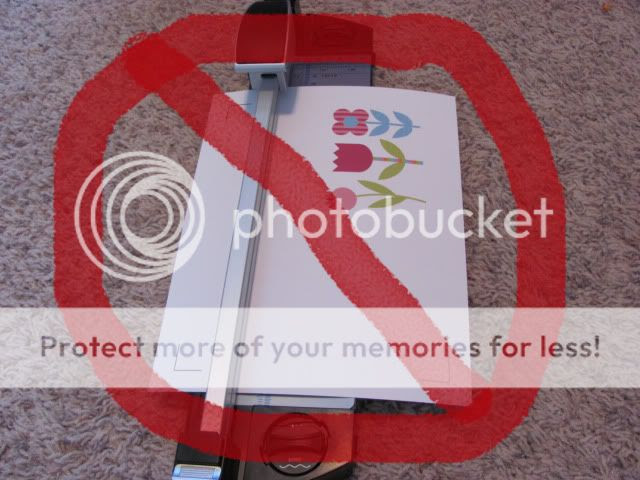
Do NOT cut your paper to fit those registration marks. For some reason, I thought that if I cut them, I would be helping the situation. Bad idea! I only made it so that my silhouette couldn't read the marks, and once again I had an "off" cut.
Do NOT cut your paper to fit those registration marks. For some reason, I thought that if I cut them, I would be helping the situation. Bad idea! I only made it so that my silhouette couldn't read the marks, and once again I had an "off" cut.
So after trial and error,
here is my finished product:
I made it for a lady I visit teach.
It's not the cutest,
but I'm getting there!
The flowers came from the adorable LD graphic set "Twitter Park Too",
and the font is called Gilligan's Island.
and the font is called Gilligan's Island.


2 comments